Your First Annotation
Now that Pointa is installed and connected to your AI tool, let's create your first annotation and see AI implement it.
Prerequisites
Before starting, make sure:
- Chrome extension is installed
- MCP is configured in your AI tool
- You have a localhost development server running (e.g.,
http://localhost:3000)
Step 1: Open Your Development Page
Navigate to your localhost development server in Chrome. Pointa only works on local development URLs like:
http://localhost:3000http://127.0.0.1:8080http://myapp.local
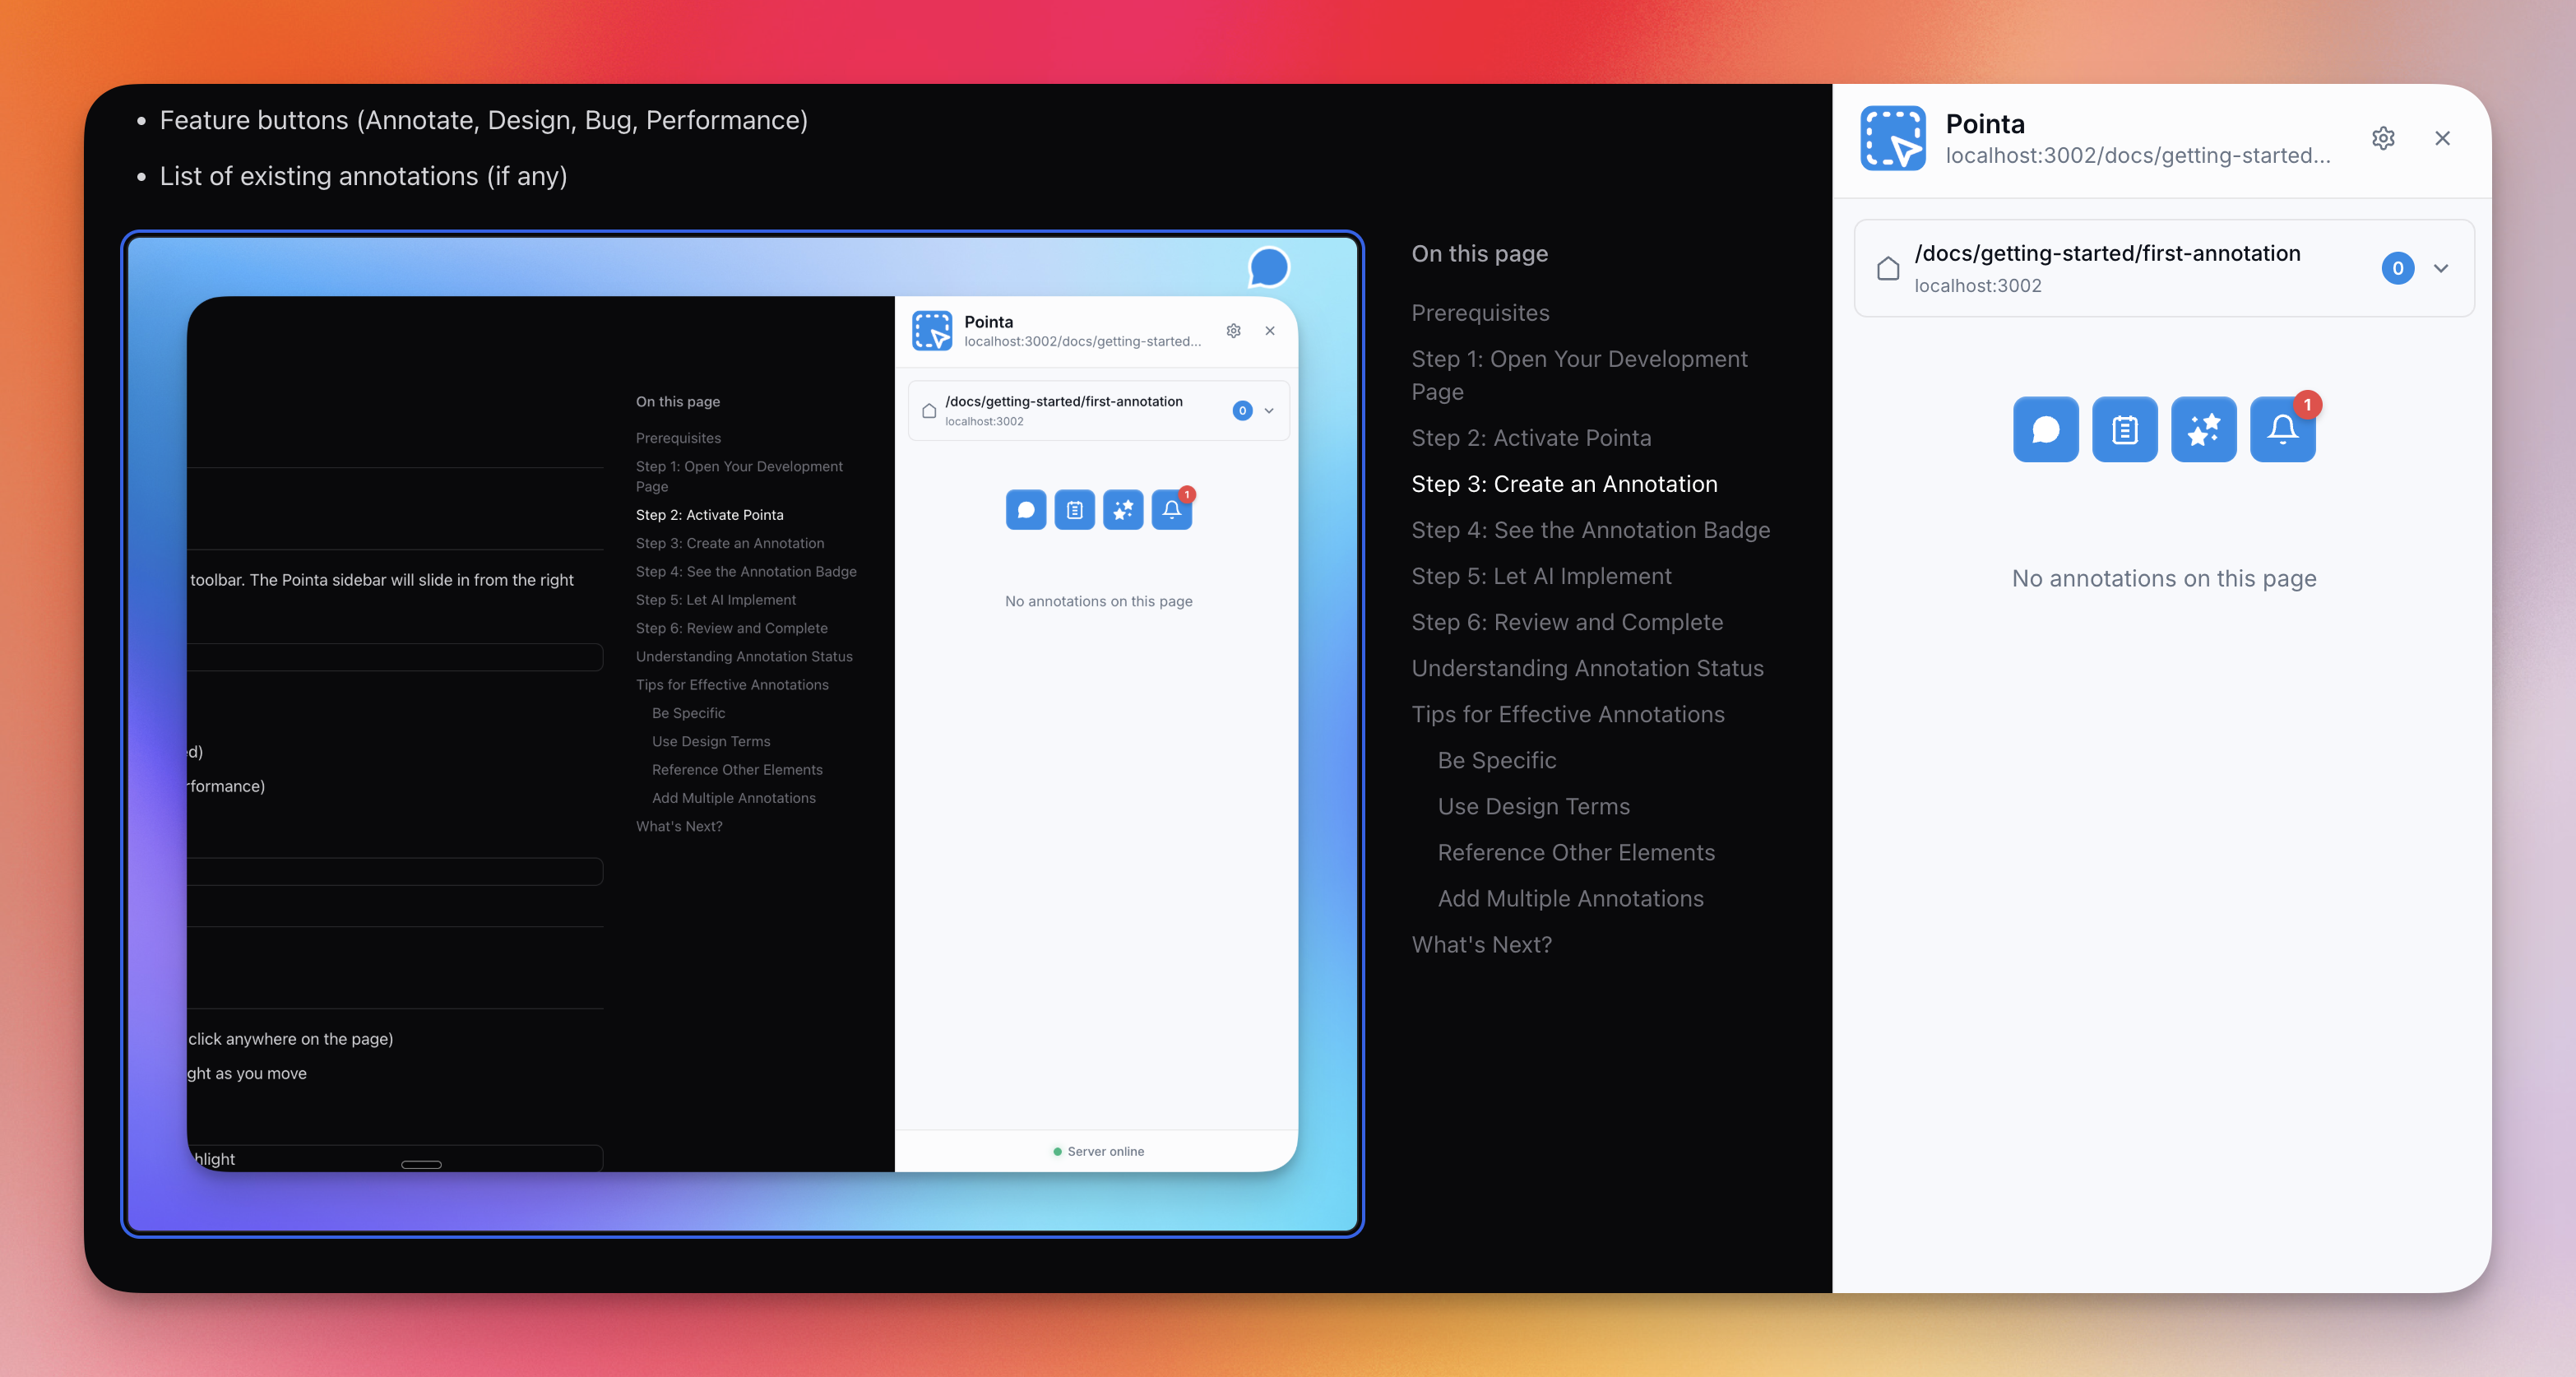
Step 2: Activate Pointa
Click the Pointa extension icon in your Chrome toolbar. The Pointa sidebar will slide in from the right side of the page.
The sidebar shows:
- Server connection status (green = connected)
- Feature buttons (Annotate, Design, Bug, Performance)
- List of existing annotations (if any)

Step 3: Create an Annotation
- Click the Annotate button in the sidebar (or click anywhere on the page)
- Hover over elements - you'll see them highlight as you move
- Click on the element you want to annotate
-
A comment modal appears - type your feedback or instructions
Example comments:
- "Make this button blue"
- "Add padding to this section"
- "Change the font size to 18px"
- "Move this below the header"
-
Click Submit to save the annotation

Step 4: See the Annotation Badge
After submitting, you'll see:
- A numbered badge appears on the annotated element
- The annotation appears in the sidebar under "Active"
![]()
The badge shows which elements have pending feedback. You can click any badge to view or edit the annotation.
Step 5: Let AI Implement
Now switch to your AI coding tool (Cursor, Claude Code, etc.) and ask it to implement your annotations.
Example prompts:
- "Implement the Pointa annotations"
- "Please work on the pending annotations from Pointa"
- "Check Pointa for any feedback and implement it"
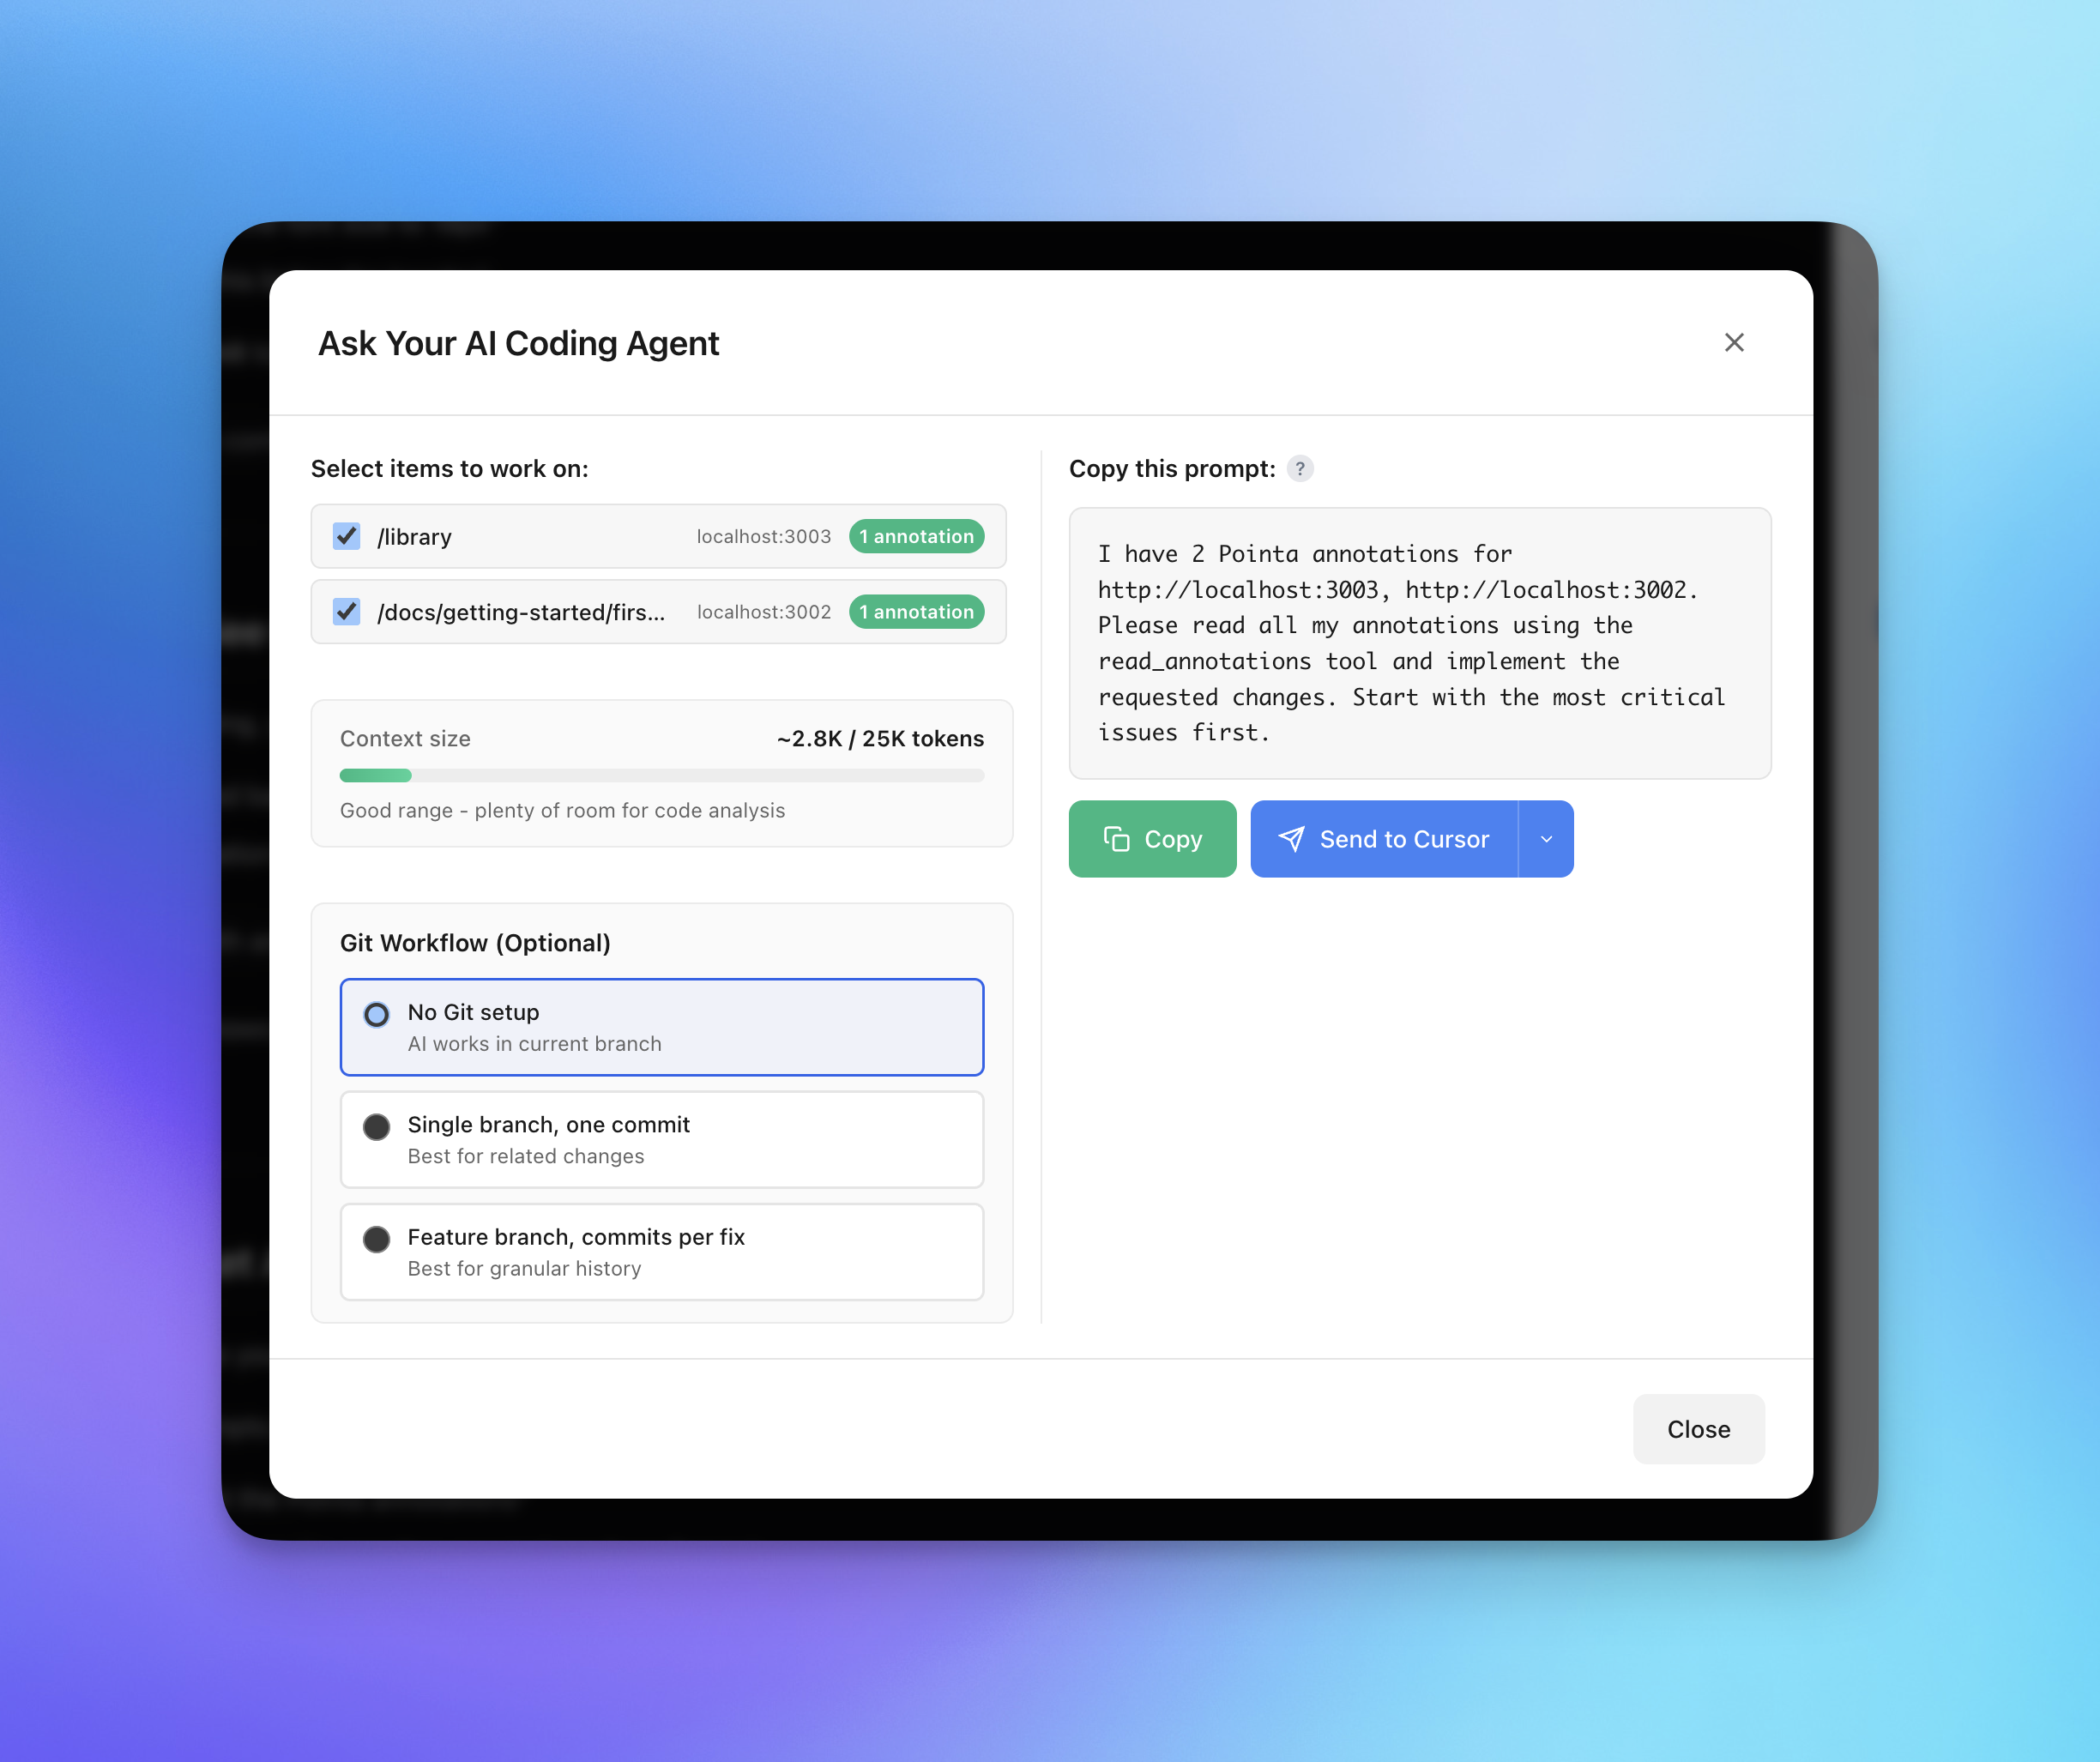
Your AI will:
- Use the
read_annotationsMCP tool to fetch your feedback - Find the relevant code files
- Make the requested changes
- Mark the annotation as "in-review"
Step 6: Review and Complete
After AI implements the changes:
- Refresh your development page to see the updates
- Check if the implementation matches your expectations
- In the Pointa sidebar, the annotation moves to "To Review" tab
If the changes look good:
- Click the checkmark to mark as Done
If you need adjustments:
- Add a follow-up comment with additional feedback
- AI will see your new message and iterate

Understanding Annotation Status
| Status | Meaning | Location in Sidebar |
|---|---|---|
| Pending | Waiting for AI to implement | "Active" tab |
| In Review | AI completed work, ready for your review | "To Review" tab |
| Done | Manually marked complete by you | Archived |
Tips for Effective Annotations
Be Specific
Instead of "make this better", try:
- "Increase padding to 24px"
- "Change background color to #f5f5f5"
- "Make font weight bold"
Use Design Terms
AI understands CSS and design terminology:
- "Add a subtle box-shadow"
- "Center this horizontally"
- "Add 1rem gap between items"
Reference Other Elements
You can mention other parts of the page:
- "Make this match the header style"
- "Use the same color as the primary button"
Add Multiple Annotations
You can add several annotations before asking AI to implement. AI will read and implement all pending annotations.
What's Next?
Now that you've created your first annotation, explore more features:
- Design Mode - Visually edit CSS in real-time
- Bug Reporting - Record bugs with full context
- Annotation Workflow - Learn the full lifecycle